Workflow
Ordering a CharlieBoard from JLCPCB
A step-by-step walkthrough of ordering a custom PCB from JLCPCB, from KiCad design files to assembled boards in the mail.
What is a Printed Circuit Board?
My first memory of actually thinking about Printed Circuit Boards (PCBs) goes back to middle school, where one of my friends had the coolest Game Boy Advance SP I'd ever seen. While the factory models had fun colorful shells, his had a transparent one. Through the shell, you could see all of the little components and connections that somehow brought Pokémon and Mario to life.
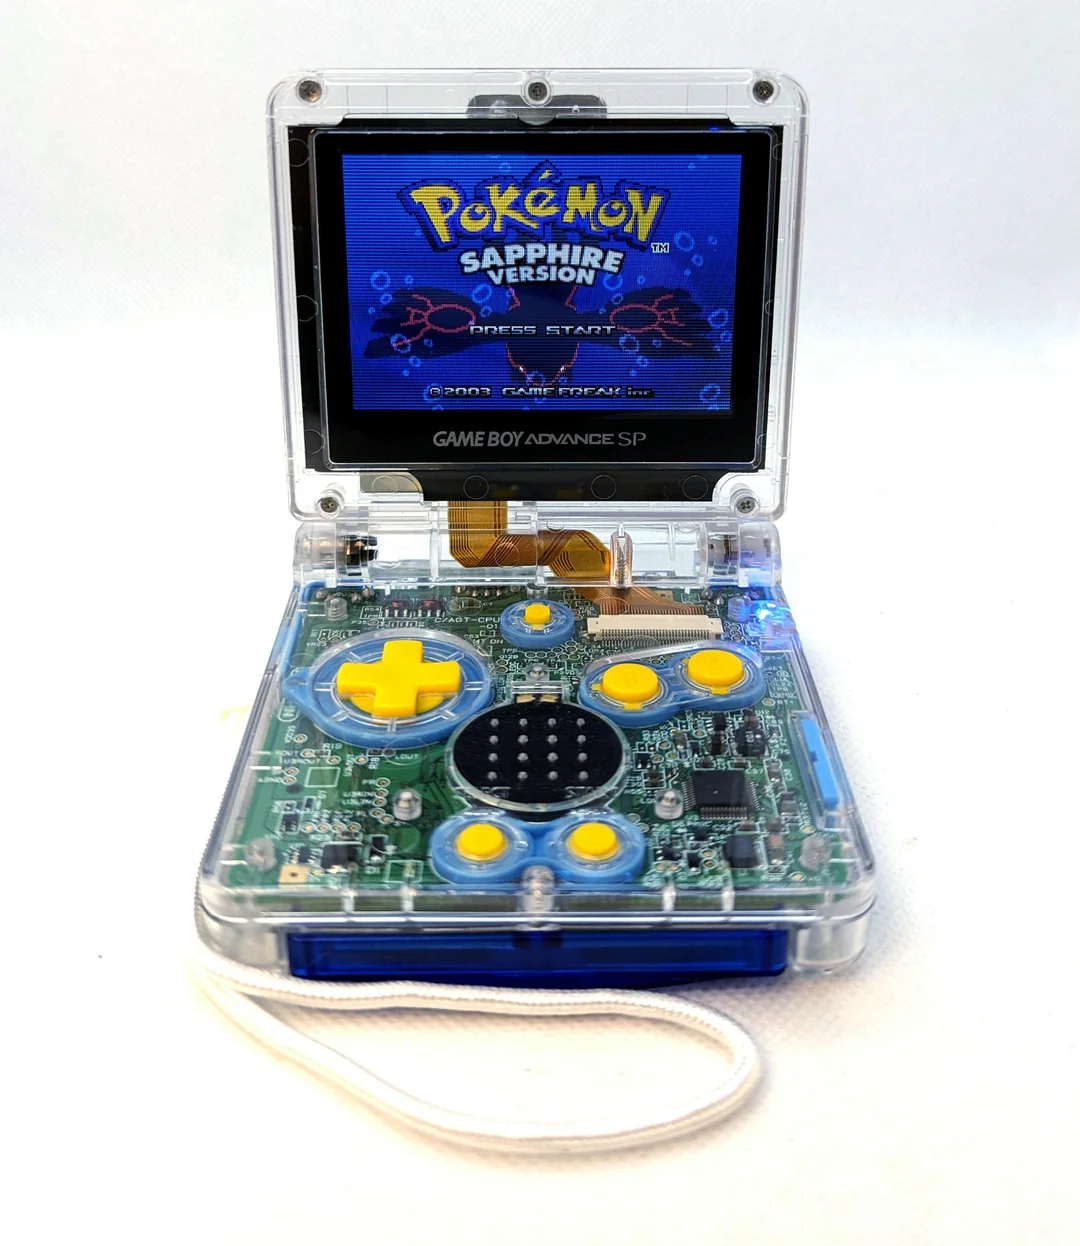
While they seemed like magic at the time, PCBs are everywhere and not that hard to understand. Simply put, a PCB is just a way of connecting electronic components together. The classic green board is made from layers of fiberglass, epoxy, and copper. By etching away copper and adding vias to link components across layers, you can create a wide variety of circuits.
What's surprising is how accessible custom PCB production has become. DIY electronics have grown enormously in popularity, and today you can have custom boards made for just a few dollars. If you want to go further, many manufacturers offer assembly services as well.
From Prototype to Product
My first few iterations of CharlieBoard used WS2812B string lights wired up on a soldered perfboard. It was a great start, but I wanted something more polished.
That pushed me to learn KiCad, a free and open-source PCB design tool with plenty of learning resources online. I am far from an expert, but Phil's Lab is a great place to start.
Once the design was ready, I needed to get it manufactured. Since CharlieBoard uses WS2812B-2020s, tiny LEDs with a 2-by-2 mm footprint, I decided it was worth paying a little extra for assembly. From KiCad, I exported the Gerber, Bill of Materials (BOM), and Pick and Place (PnP) files.
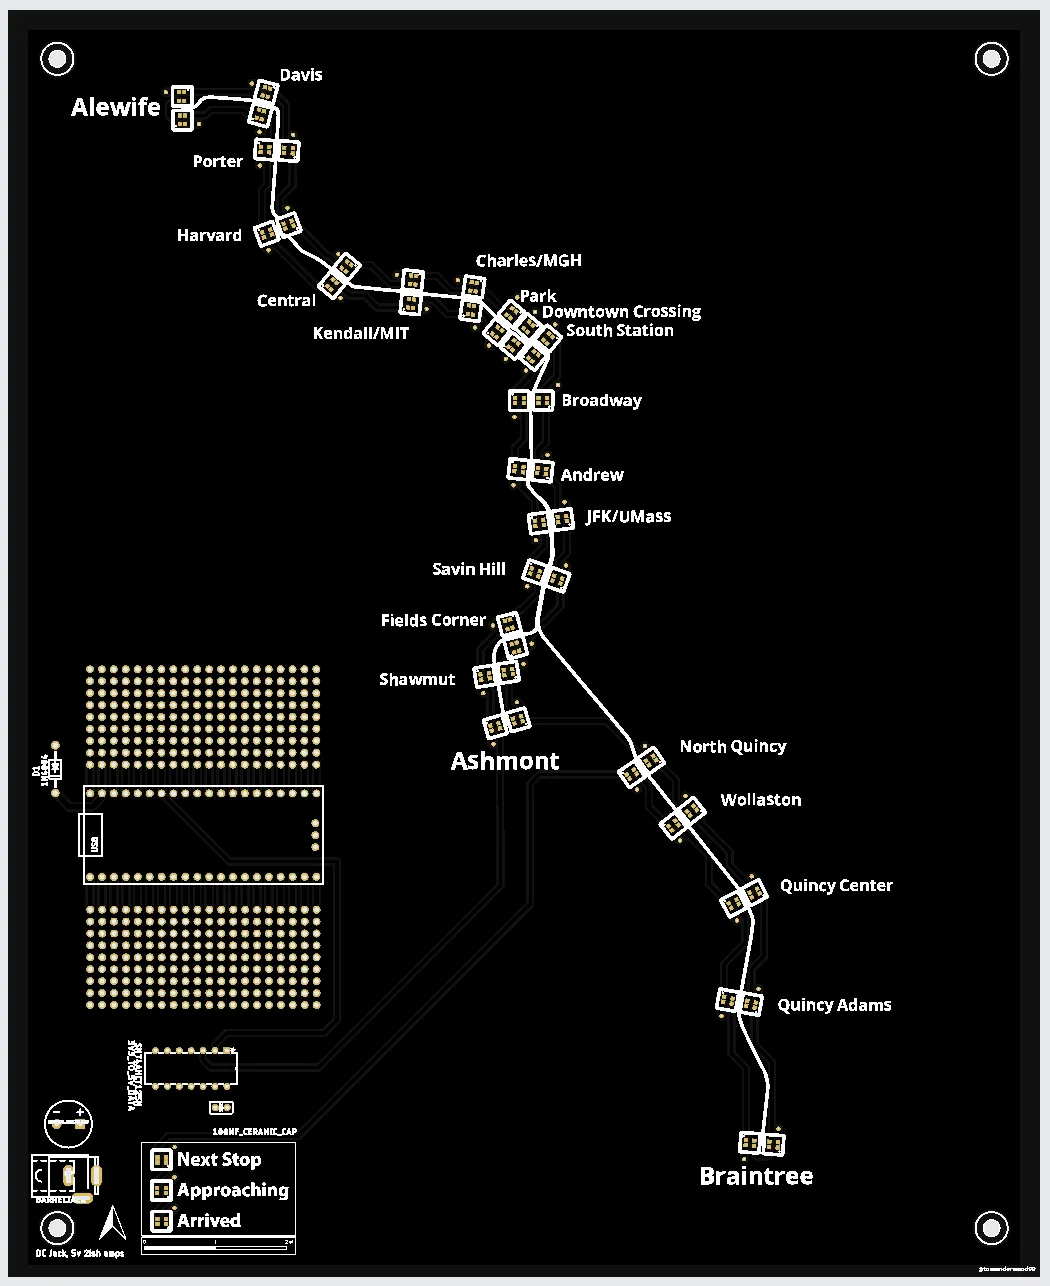
These files together describe the board to several machines: the Gerber file defines each layer's copper traces and connections, the BOM lists each component and its footprint, and the PnP file specifies each component's placement and rotation.
Ordering from JLCPCB
After getting a few manufacturing quotes, I landed on JLCPCB. JLCPCB is a popular PCB manufacturer, largely due to their low prices and wide range of services. I would love to have these manufactured in the US, but quotes from US manufacturers were 2-5x more expensive than JLCPCB (let me know if you know of any cheaper options!).
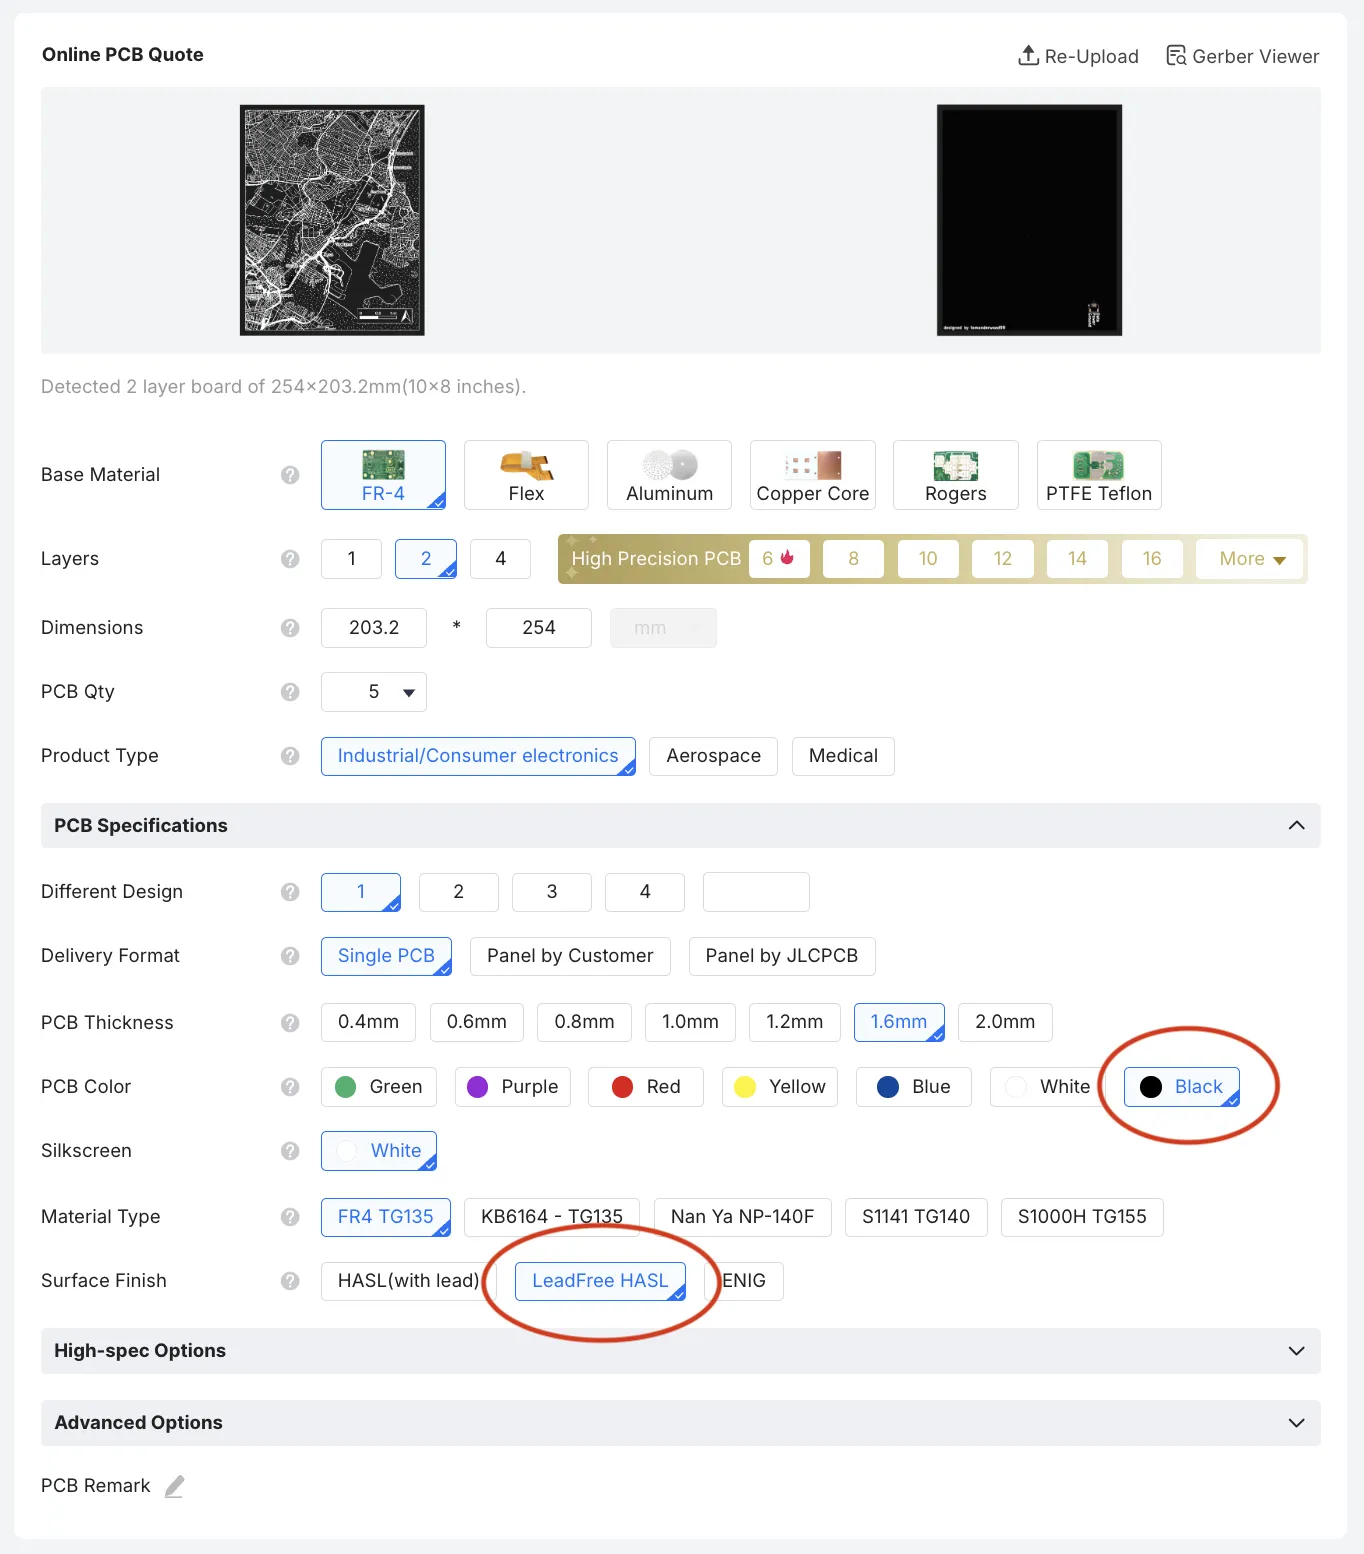
If you want to follow along, download the design files from my GitHub repository. Then sign into JLCPCB, and upload the Gerber files on the Instant Quote page. Here, I usually go with a black solder mask and lead-free HASL.
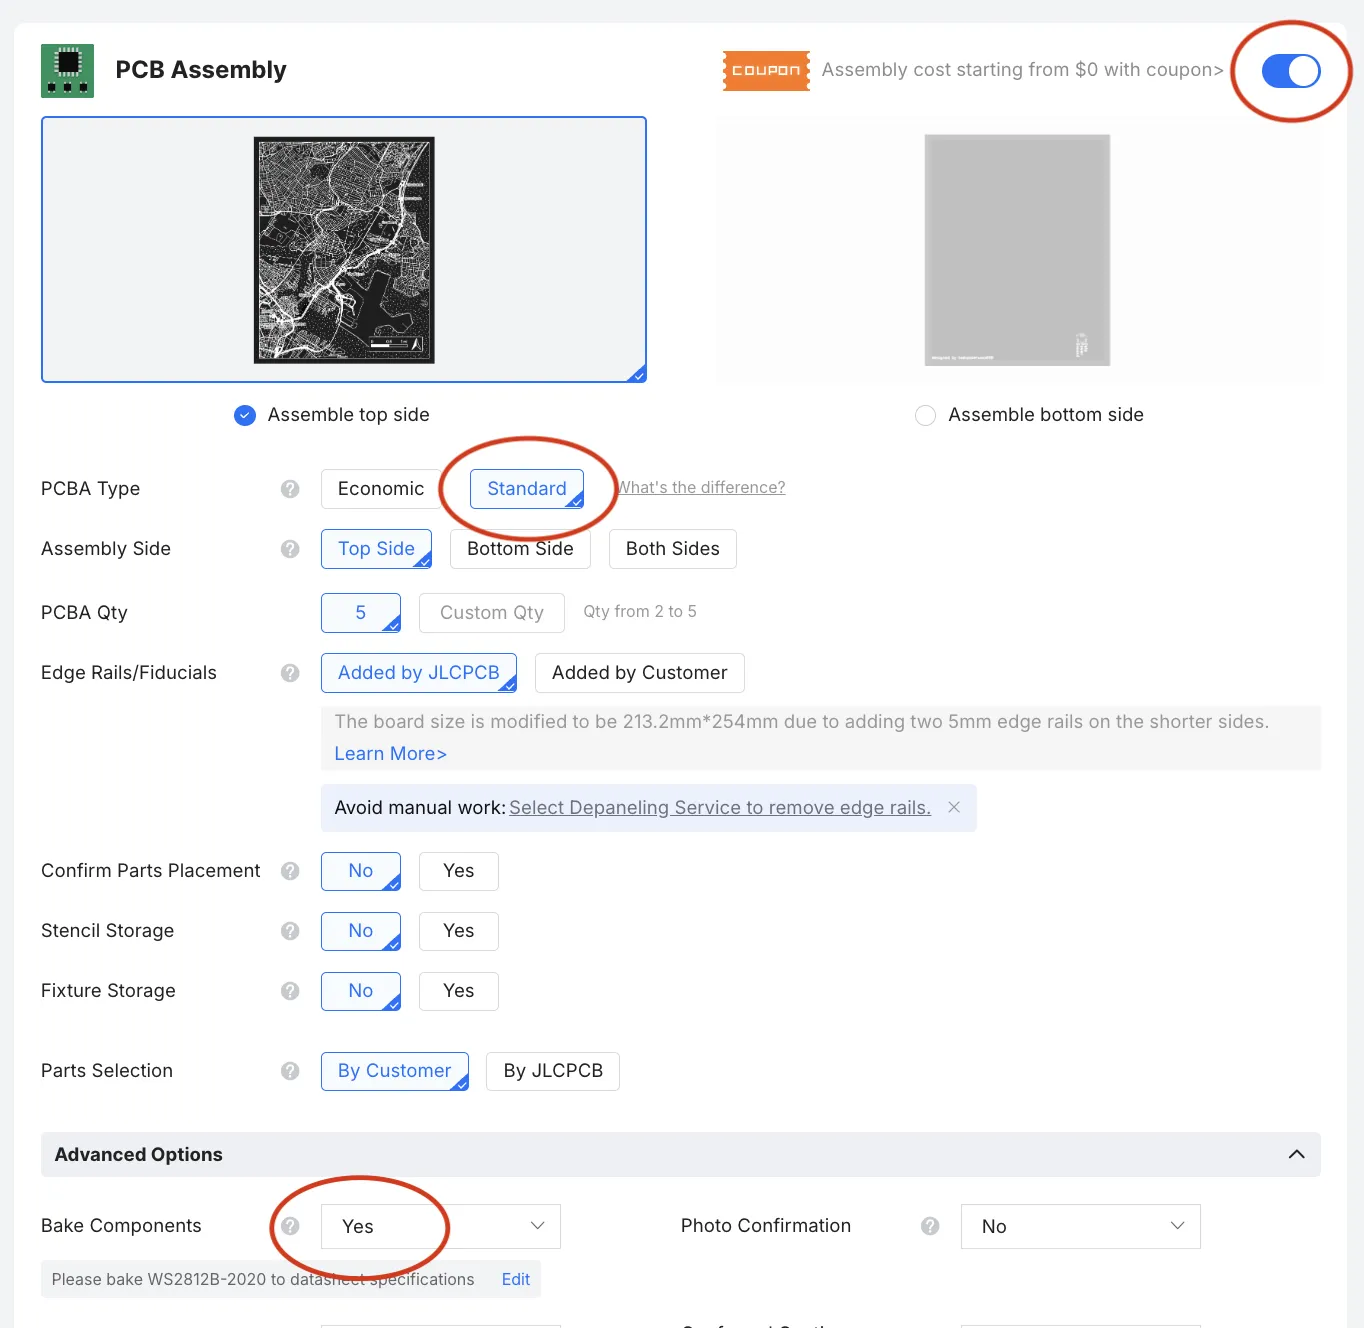
At the bottom of the page, select "PCB Assembly" and choose "Standard Assembly" with "Bake Components" set to Yes. Baking drives out any moisture the LEDs may have absorbed, which prevents failures during soldering. Click Next, review the board rendering, and click Next again.
On the following page, upload the BOM and PnP files. These require specific formatting, so follow JLCPCB's instructions if working with your own files. Click through the remaining pages, reviewing each step, then save the order to your cart. Add your shipping and payment details, and you are done!
With that, you have ordered your own CharlieBoard! It was a nerve-wracking process at first, but the boards came out great, and the process was surprisingly easy.
CharlieBoard is a simple PCB, but learning how to design and manufacture PCBs was a significant learning process. I'm looking forward to tackling more complex designs in future projects, and while I'll probably never build something as intricate as a Game Boy, it's satisfying to understand a little more of how they work.