Deep Dive
Addressable LEDs for CharlieBoard
Controlling over 100 individual LEDs sounds daunting. LED matrices and addressable LEDs are two different approaches for solving this problem.
Turning LEDs on and off
This project, being inspired by other MBTA API display projects, was started with the assumption that controlling individual LEDs was straightforward. Looking back, I really don't know how I thought this was done.
When I think of LEDs, I usually picture Christmas lights: plug in a string and every bulb turns on at once, with no way to control them individually.

When looking at transit displays, it seems that it would be impossible to turn each LED on and off individually. Boston's transit system has over 100 stations, each being represented by at least two LEDs. How could you possibly control all of the LEDs individually?
Tricking the Human Eye
While controlling the LEDs individually seems overwhelming, some of these displays take advantage of "persistence of vision" to simplify the problem. These displays take advantage of the fact that the human eye retains an image for a short period of time, allowing an LED to appear to be on as long as it is blinking fast enough.
While this does not seem useful at first, it allows displays to multiplex many LEDs with a single microcontroller. For example, let's imagine controlling 20 LEDs. Instead of connecting these LEDs in parallel like Christmas lights, we can arrange them on a 4x5 grid. In this grid, the vertical lines are ground connections while the horizontal lines are power connections.
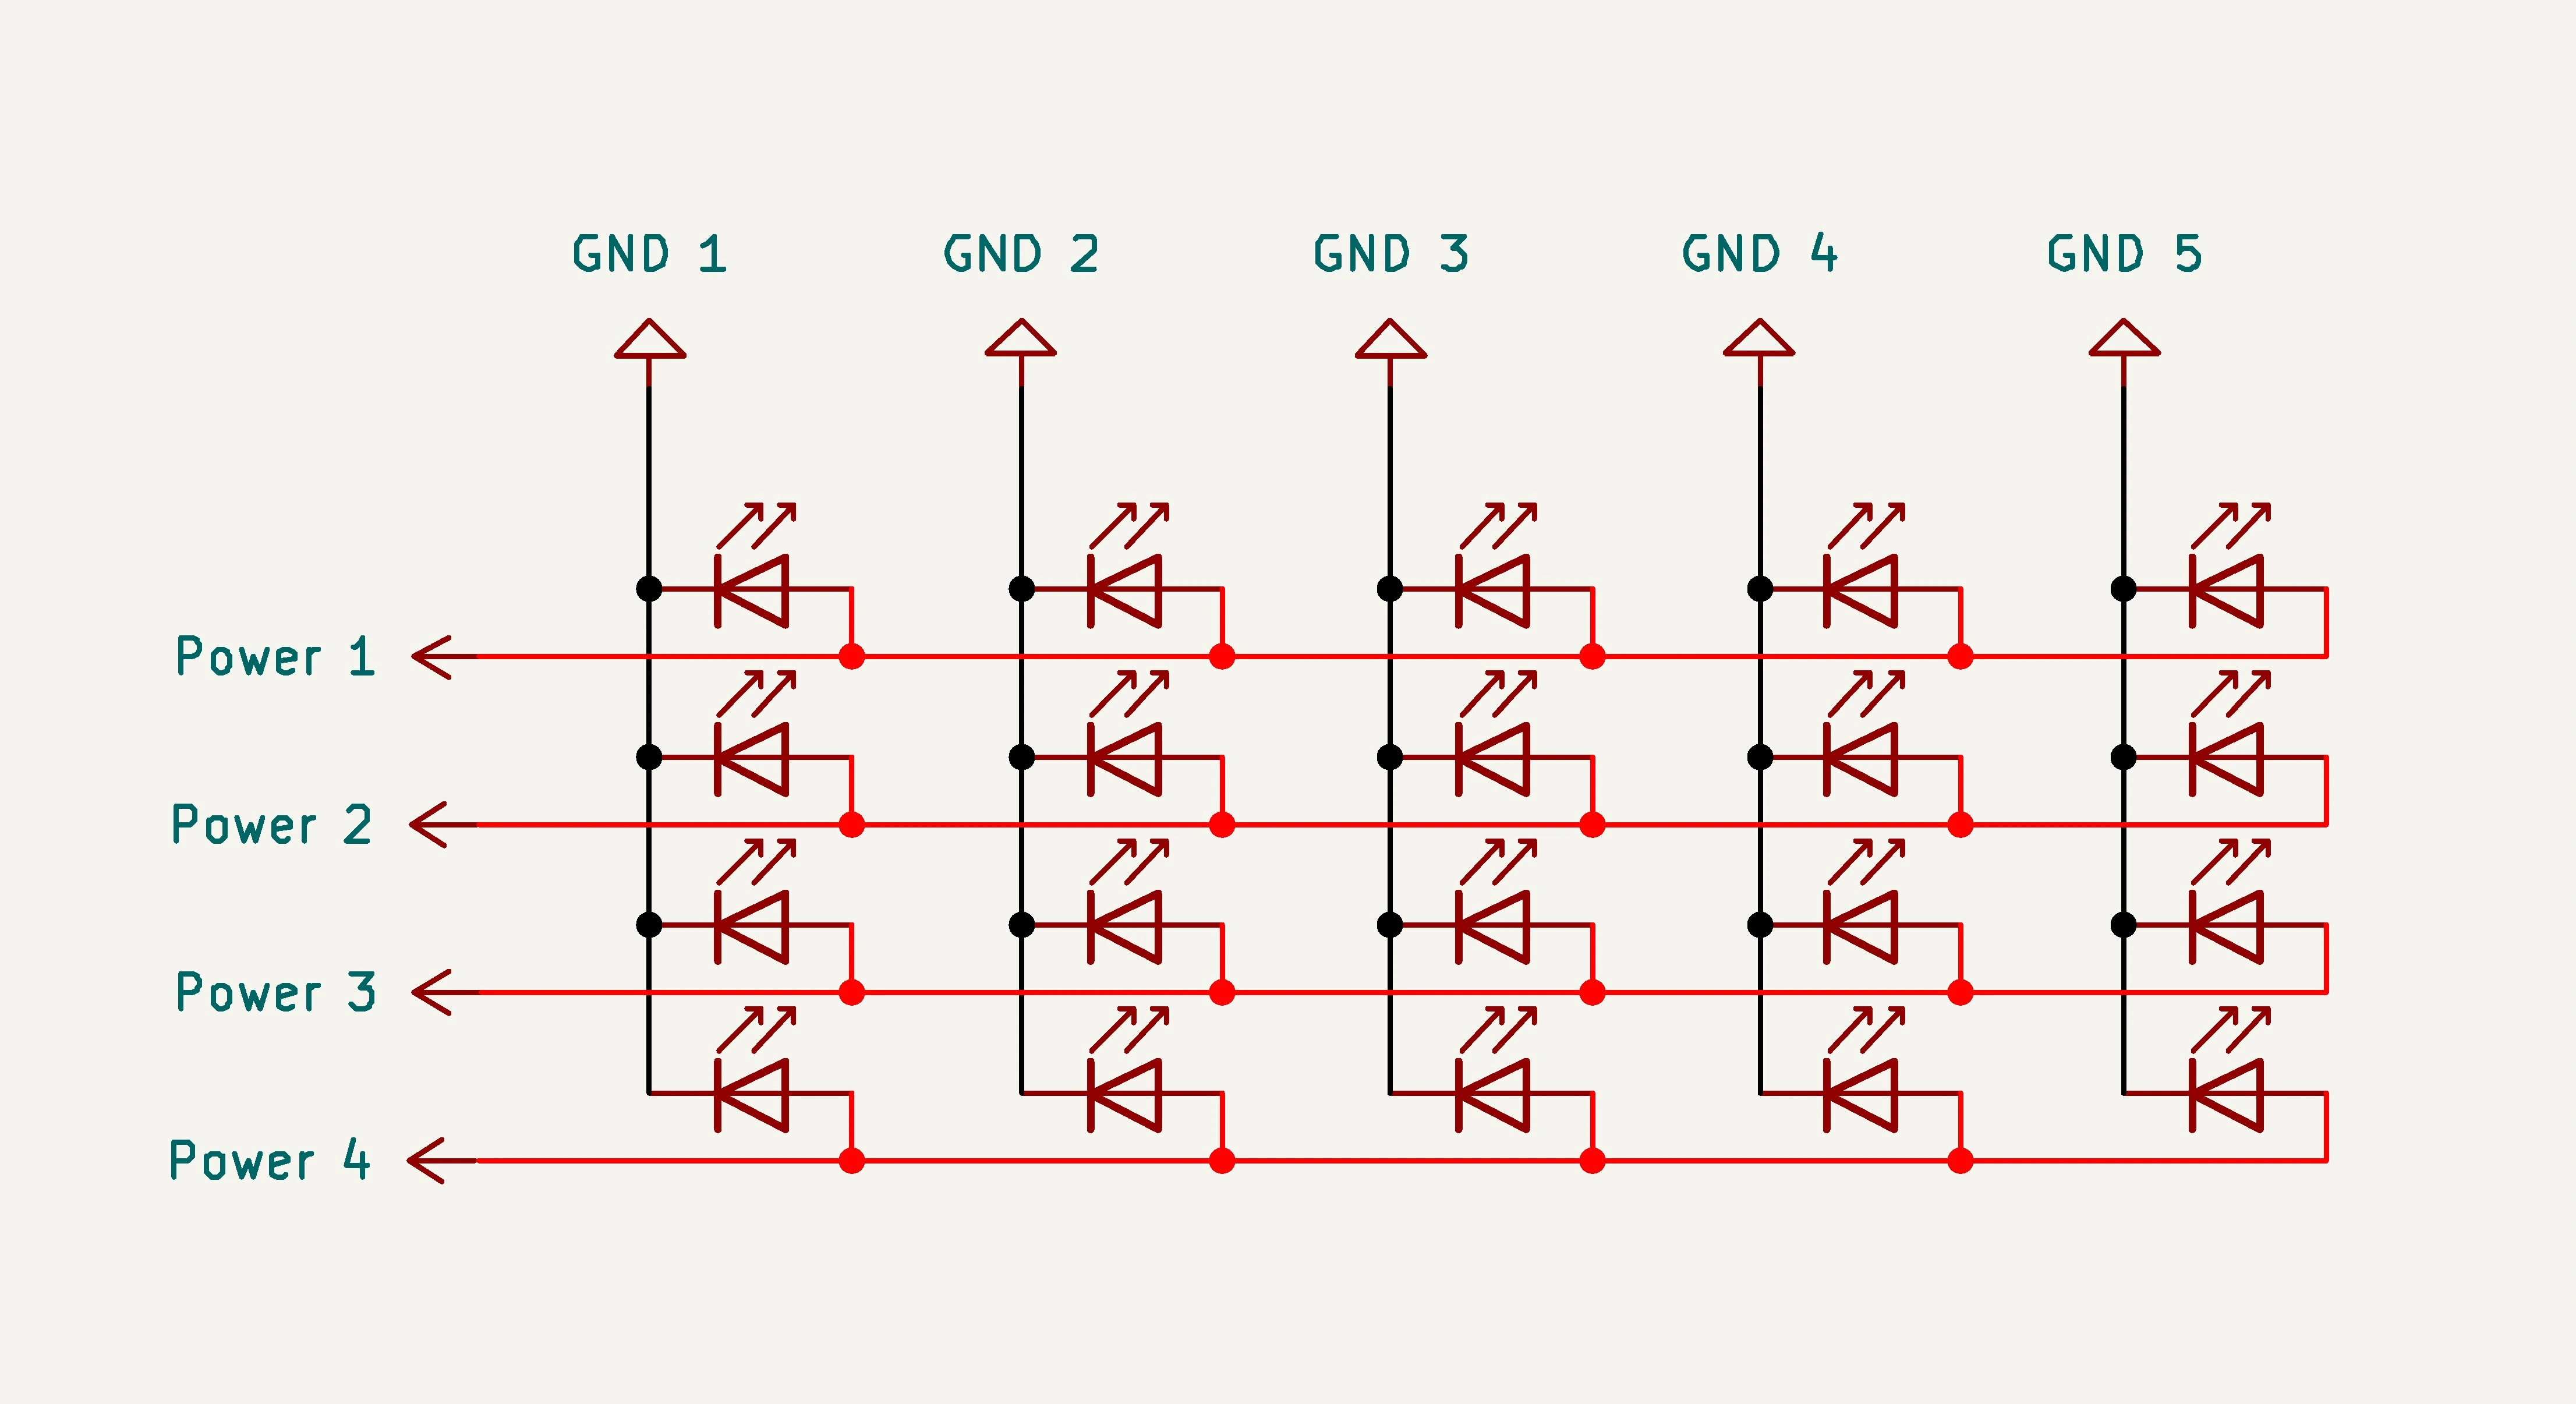
In this arrangement, a microcontroller can control each LED by toggling a combination of ground and power lines. For example, to turn on the LED in the top left corner, the microcontroller would toggle the power line for the top row and the ground line for the left column. To turn on half of the LEDs, the microcontroller would toggle each combination individually, and then cycle through the combinations so fast that the human eye cannot perceive it.
Addressable LEDs
While persistence of vision is a cool trick, it requires more complicated layouts to work. Some displays, like CharlieBoard, use a different approach to control the LEDs.
For CharlieBoard, I decided to use LEDs from the WS2812B series. In this family of LEDs, each diode has its own embedded controller. Unlike traditional 2-pin LEDs, these LEDs have 4 pins: power, ground, data in, and data out. When wired up, these LEDs play telephone with each other. Data from a microcontroller is sent to the first LED in the chain. The controller in that LED processes what it should display, and sends the remainder of the data down the line, repeating the process all the way to the last LED in the chain.
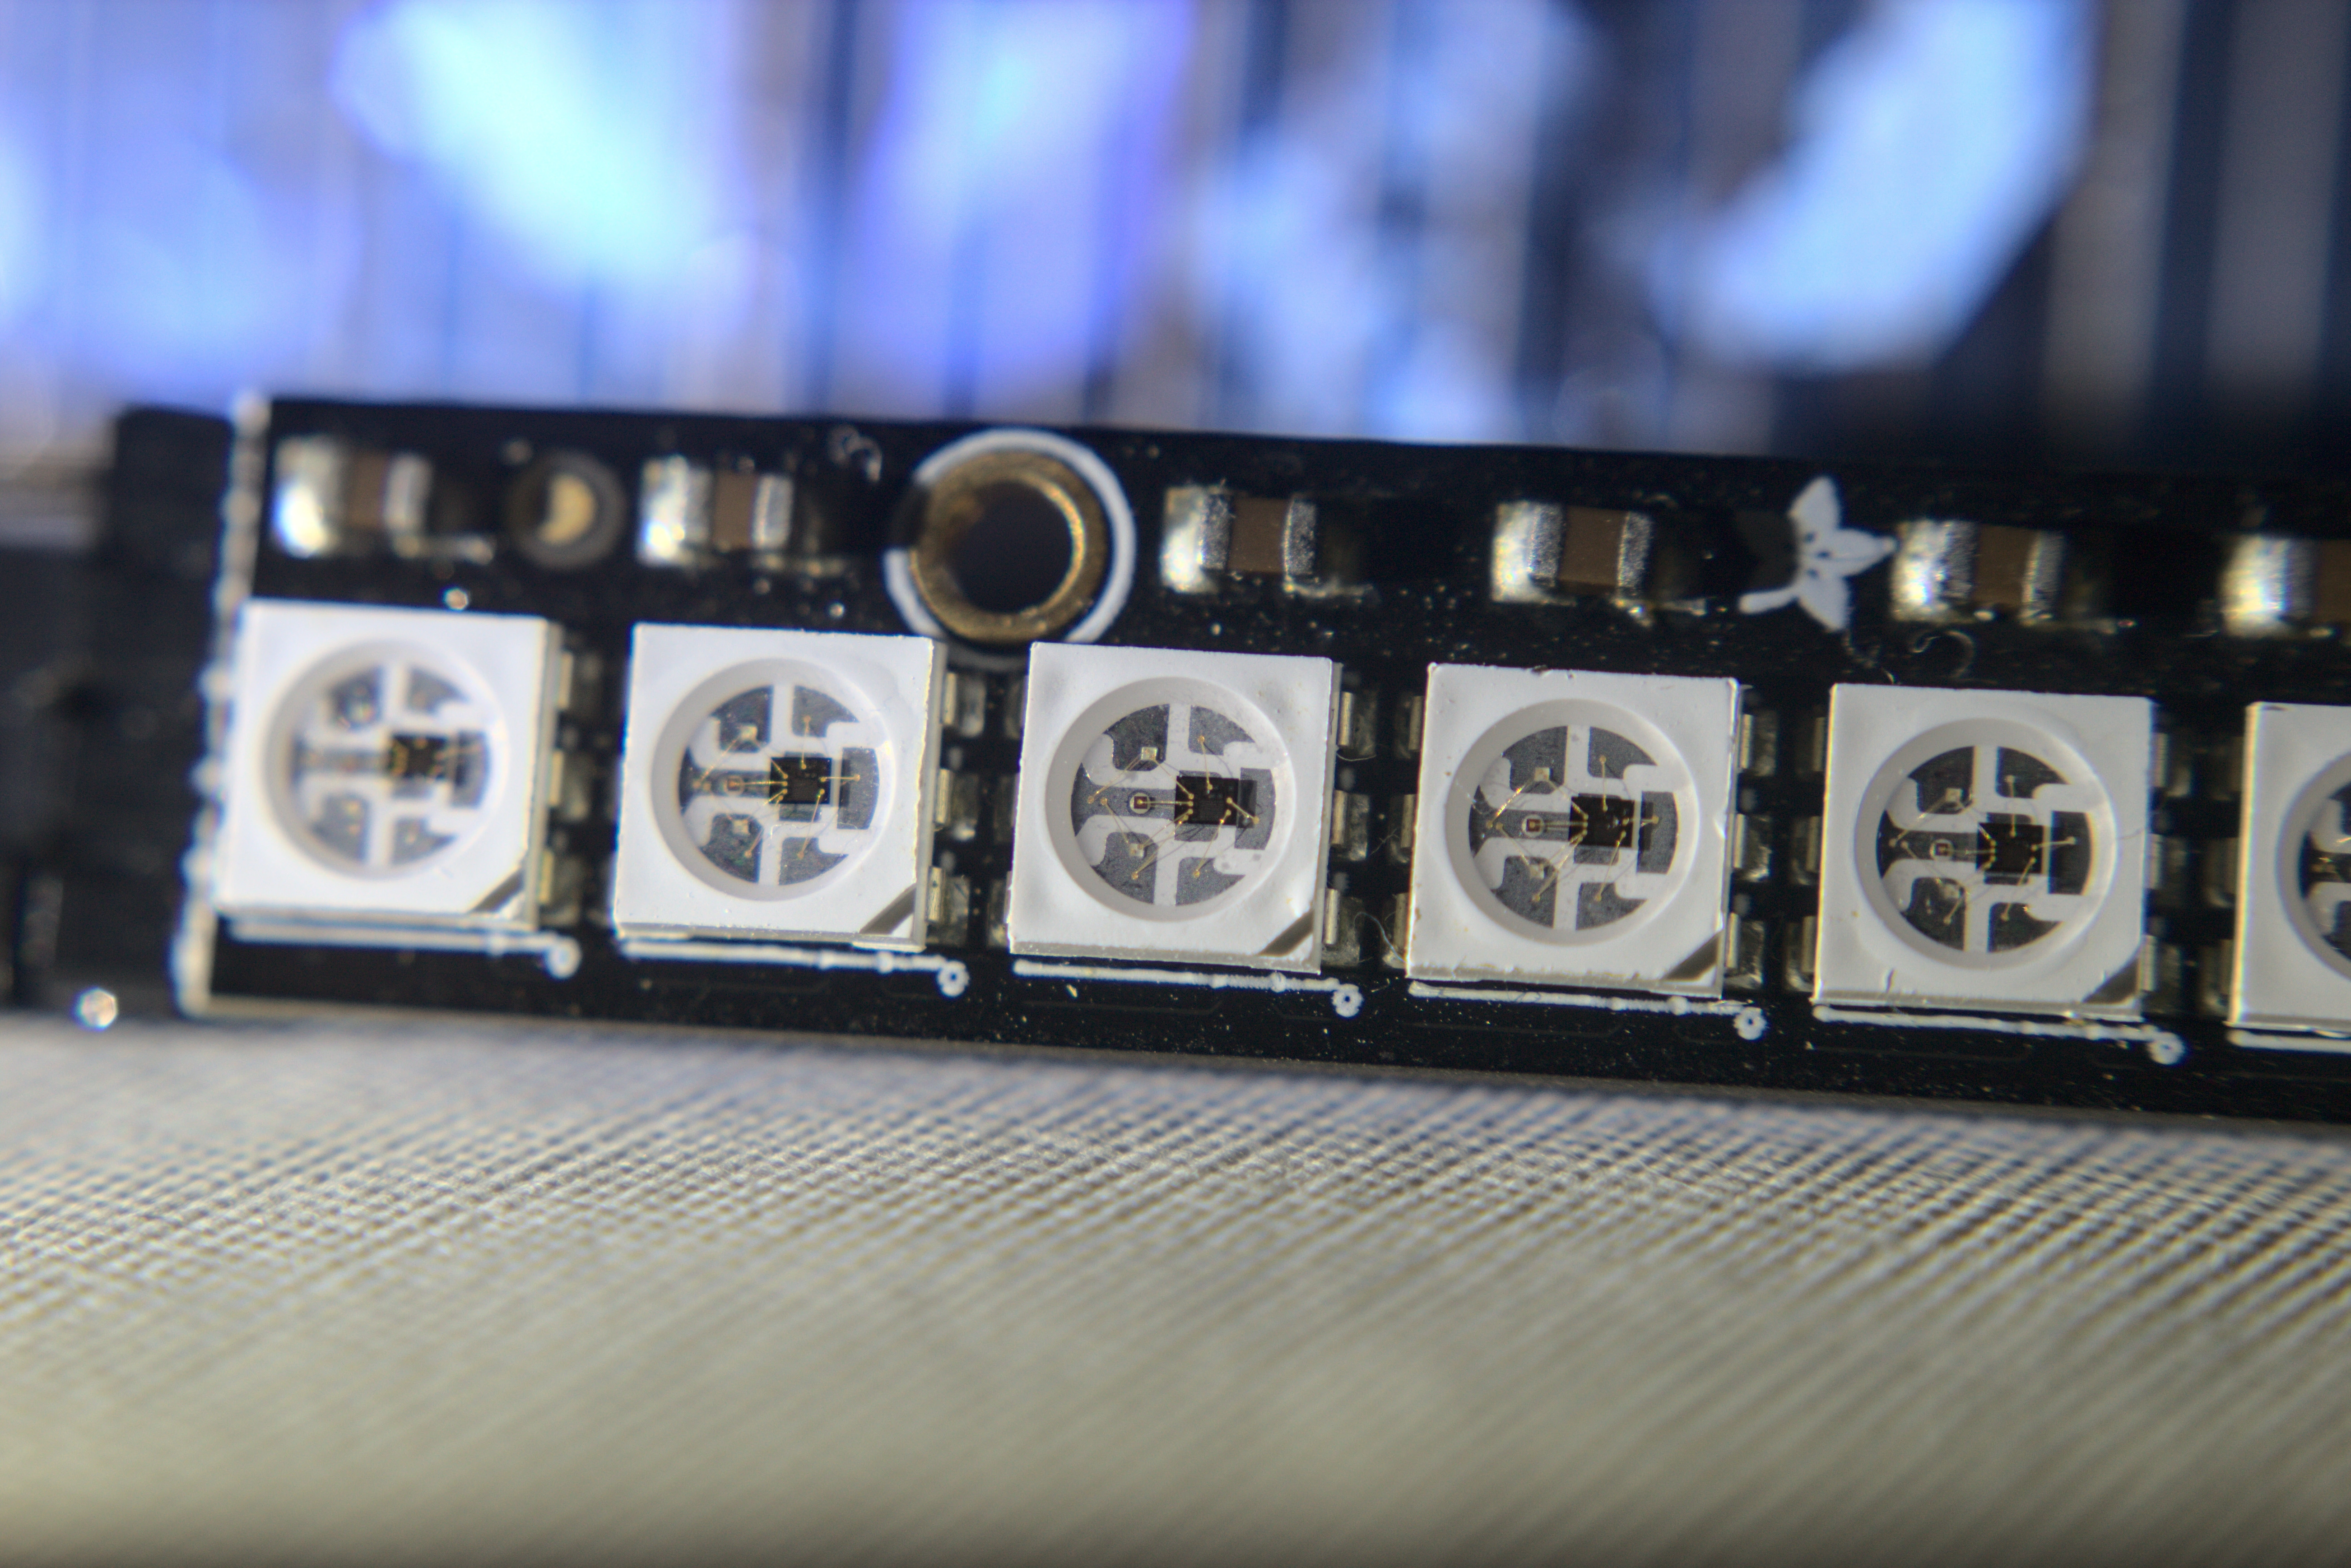
WS2812B LEDs are more expensive than traditional 2-pin LEDs, but the added simplicity is worth it. A single data line driving the entire chain made designing the PCB much simpler. Additionally, these LEDs support full RGB color, enabling more interesting display modes.
Choosing between these approaches comes down to your project's needs, and working through that decision taught me a lot hardware design. These are the types of challenges you don't think about until you have to, and I came away with a much better understanding of the tradeoffs involved.